Does getting your home market‑ready mean sanding away the very details that make it special? If you own a period house in Richmond’s Museum District, you know its soul lives in the mantels, millwork, and timeworn floors. You want strong offers this spring without stripping out character. In this guide, you’ll learn reversible staging steps, photo‑ready styling, and simple safety checks that protect your home’s history while boosting buyer appeal. Let’s dive in.
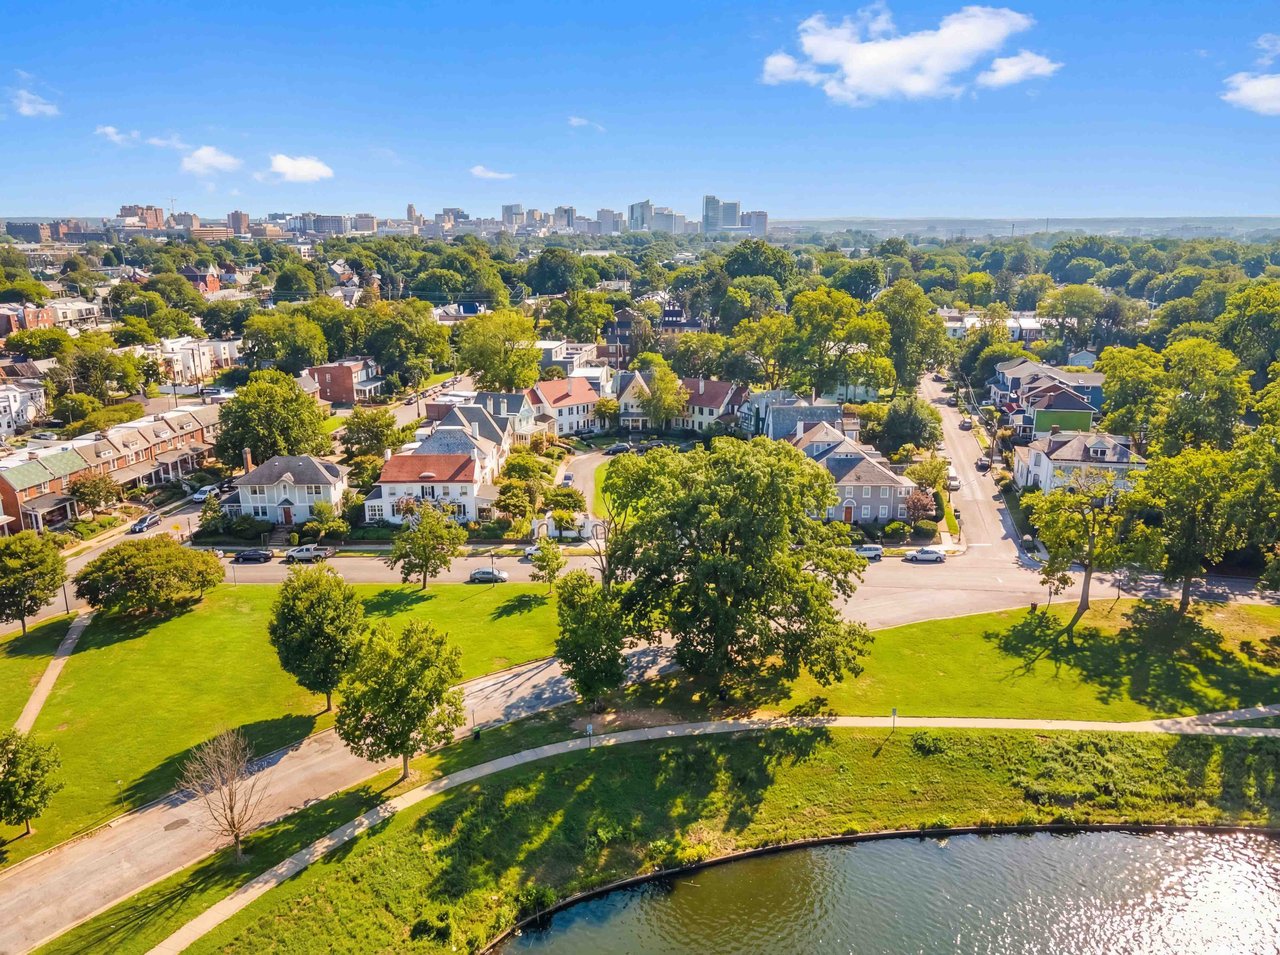
What gives Museum District homes their soul
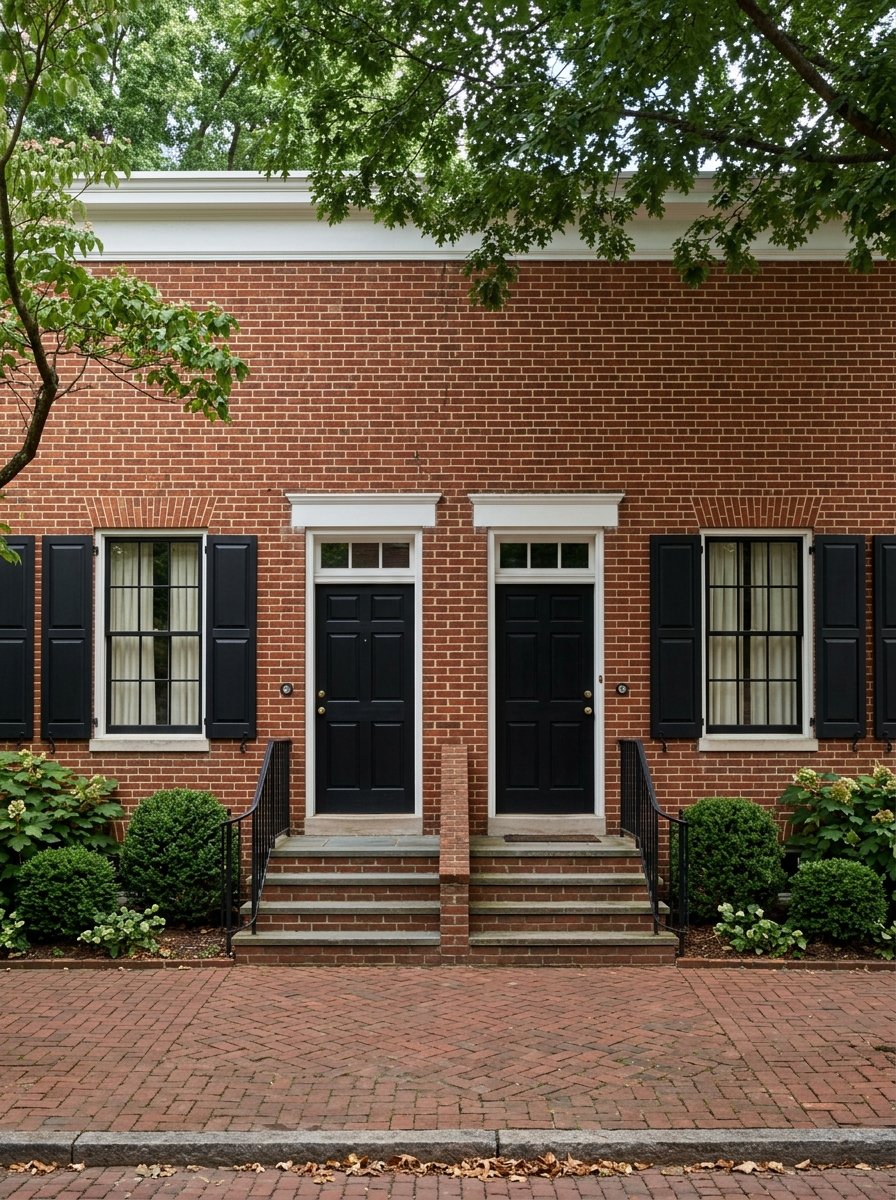
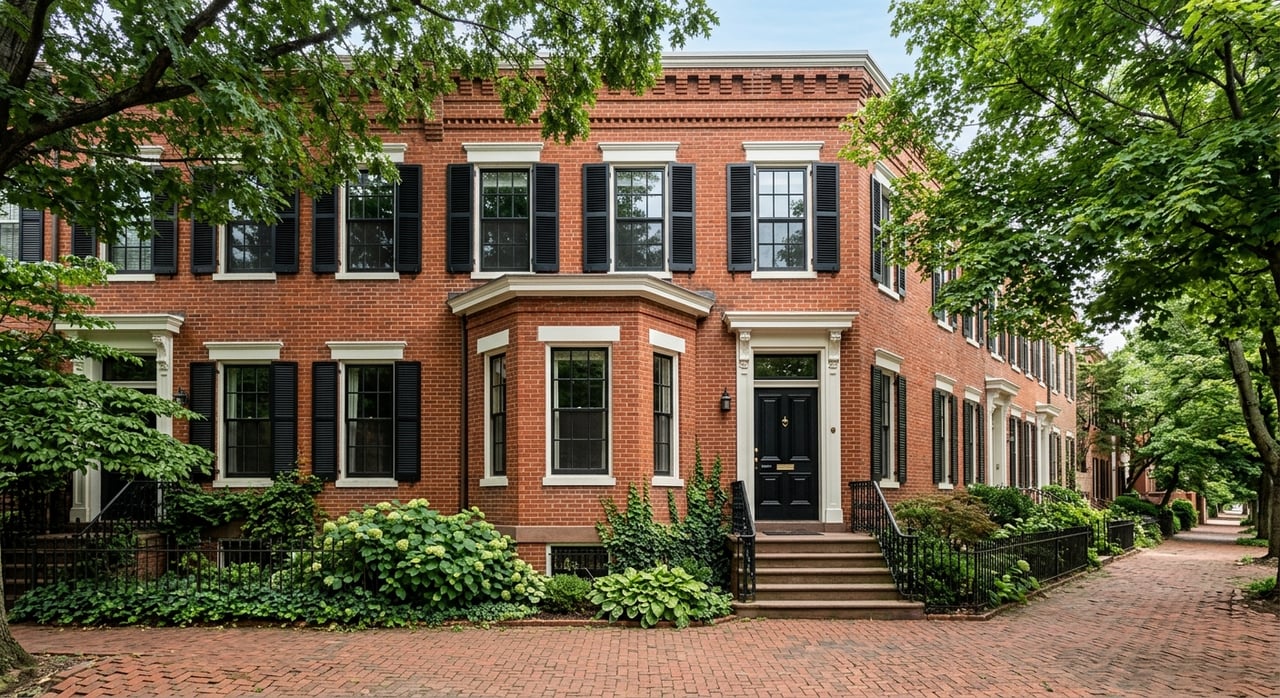
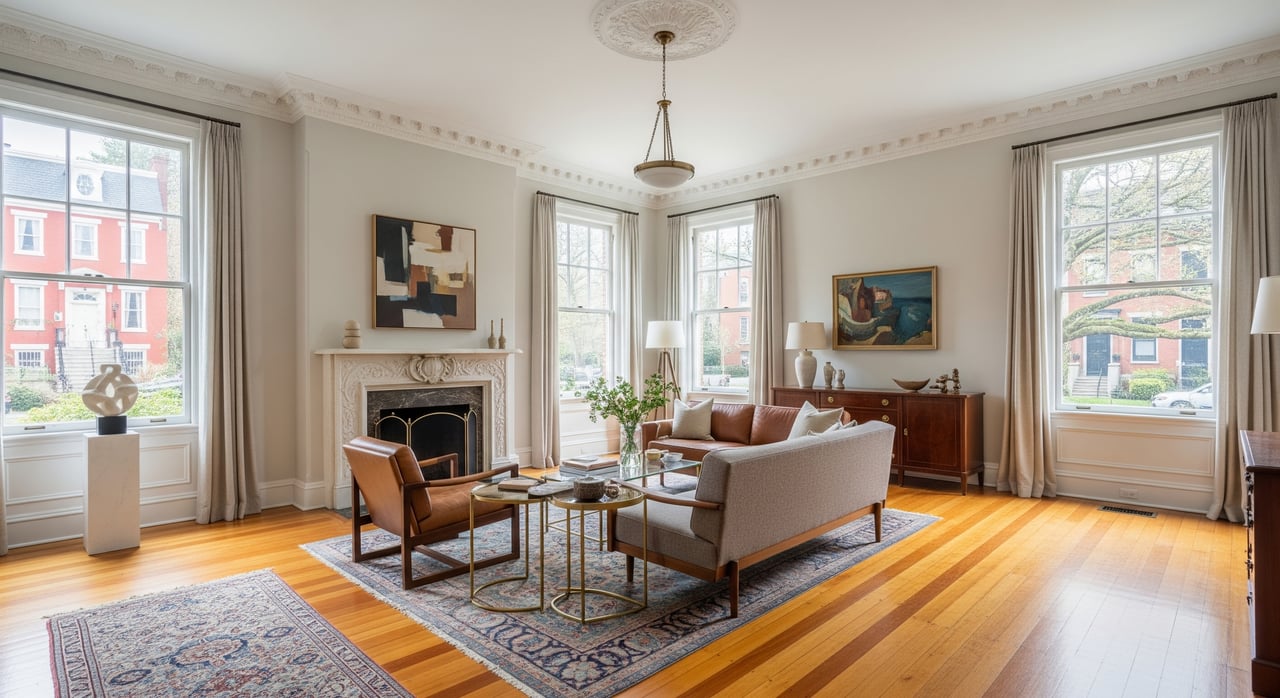
Richmond’s Museum District is rich in late‑19th and early‑20th century architecture. You see Queen Anne and Victorian forms, Colonial Revival symmetry, and Craftsman or Bungalow details. Many homes still feature plaster walls, detailed wood moldings, original mantels, stained glass, built‑ins, and historic flooring.
Buyers come here for those features. Your job is to frame them, not replace them. If you need guidance on historic context or best practices, start with statewide resources from the Virginia Department of Historic Resources.
Preserve character, stage for today’s buyer
The big idea is simple: make rooms feel bright, comfortable, and functional while letting the architecture lead.
Light it right
- Remove heavy drapes and use sheers or neutral panels so window trim and stained glass read clearly.
- Layer lighting. Combine ceiling fixtures with table or floor lamps, and add accent lighting for mantels or built‑ins.
- Use warm LEDs, around 2700 to 3000K, with a CRI of 90 or higher. Warm light flatters old wood and photographs well.
- For curb appeal and twilight photos, update porch and pathway lighting with period‑appropriate fixtures.
Choose colors and finishes that honor age
- Favor warm whites, soft grays, and muted historic hues that complement original woodwork.
- If trim is original and in fair shape, keep it natural or refinish rather than paint. If you must paint, match the tone to existing finishes for a cohesive look.
- For exterior colors, check local guidance before painting in case approvals are needed.
Get furniture scale and layout right
- Many rooms are narrower with high ceilings. Pick slimmer sofas and chairs that keep pathways open and sightlines clear.
- Avoid oversized sectionals that block mantels, transoms, or built‑ins.
- Create simple, purposeful groupings. A pair of chairs and a small table by the fireplace can highlight the mantle as a focal point.
Use textiles and rugs to support, not smother
- Size area rugs so you still see a band of original flooring around the edges.
- Choose linen, cotton, or wool in subtle patterns for a layered but calm feel.
- If carpeting is worn, consider exposing wood floors where it can be done safely and quickly.
Restore and emphasize focal points
- Clean and polish mantels, secure any loose trim, and touch up finish on railings and built‑ins.
- Clean or reglaze stained glass. Replace missing or broken hardware with sympathetic pieces.
- Focus on small visual wins. Full restorations often take time and budget that do not return quickly before a sale.
Modernize with restraint
- Kitchens and baths respond well to low‑impact updates like fresh cabinet paint, new hardware, a simple tile backsplash, and updated lighting.
- Make visible, documented system upgrades easy for buyers to understand. Place a neat folder with permits and warranties on the kitchen counter during showings.
Plan around rules and safety
The Museum District spans the City of Richmond and areas that abut Henrico County. Exterior changes in certain historic districts can require review. Confirm your property’s jurisdiction and whether your exterior work needs approval before you paint, re‑roof, or alter porches. You can find county resources through Henrico County planning and historic resources, and statewide context through the Virginia Department of Historic Resources.
Because most homes here predate 1978, federal rules on lead apply. Before disturbing painted surfaces, understand seller disclosure requirements and safe practices in the EPA guide to lead‑based paint rules for sellers. Other age‑related materials, like asbestos, knob‑and‑tube wiring, and older HVAC or electrical systems, should be evaluated and addressed by licensed pros if needed. Staging can proceed safely while you plan any necessary repairs.
If you want deeper preservation guidance, the National Park Service Technical Preservation Services and the National Trust for Historic Preservation both offer thoughtful resources on balancing updates with architectural integrity.
A simple before‑and‑after staging plan
Use this four‑phase plan to prep your home for the spring market without losing its soul.
Phase 1: Assessment, 1 to 7 days
- Walk the house and list architectural assets and issues. Note mantels, stairs, floors, windows, plaster, trim, and porch details.
- Confirm whether the property sits in the City of Richmond or Henrico County and whether exterior work needs approval.
- Identify quick wins like deep cleaning, decluttering, and lighting improvements, along with any bigger repairs to defer.
- Check for lead paint risks before sanding or stripping any painted surfaces.
Deliverable: a focused staging scope and a prioritized budget.
Phase 2: High‑ROI, reversible updates, 1 to 3 weeks
- Deep clean, declutter, and depersonalize. Remove family photos and polarizing decor.
- Refresh paint on walls in a neutral palette that pairs with existing woodwork.
- Repair and touch up mantels, trim, and built‑ins. Clean stained glass and reglaze where needed.
- Update lighting. Swap bulbs to warm LEDs and add lamps for layered light. Consider a period‑appropriate porch fixture for charm and safety.
- Replace dated cabinet pulls and door hardware with finishes that suit the home’s era.
Phase 3: Styling and furniture placement, about 1 week
- Arrange furniture to show clear flow and sightlines to focal features like fireplaces or built‑ins.
- Choose rugs that frame, not cover, original floors.
- Add a few subtle nods to history, such as a vintage rug or a framed historic map of Richmond. Avoid theme staging.
- On the porch, set two chairs and planters to highlight daily livability.
Phase 4: Photo and open house prep, 48 to 72 hours
- Do a final clean. Polish hardware, place fresh flowers, and check that all bulbs match in color temperature.
- Open curtains, turn on all lights, and remove small personal items and cords.
- Keep kitchen and bath counters mostly clear. One bowl of fruit or a simple place setting is enough.
Timeline tip: Plan ahead. Cosmetic staging can happen in one to three weeks. Historically sensitive exterior work may require more time for approvals and contractors, so schedule early if you are targeting a spring launch.
Photography that shows the soul
The right images help buyers feel the story of your home and see how it lives today.
Plan the shoot
- Schedule interior photos for midday when natural light is bright but soft.
- Capture exterior twilight shots for glow and curb appeal.
- Prepare a shot list that includes room overviews plus detail close‑ups of mantels, stair newels, stained glass, built‑ins, floor inlays, and historic hardware.
Share simple camera guidance with your pro
- Use a tripod and bracketed exposures to balance window light and interior shadows.
- Choose a moderate wide‑angle lens to avoid distorting historic proportions.
- Use natural light plus interior fixtures, and correct white balance to keep wood tones warm and accurate.
For broader best practices, review NAR resources on staging and photography.
Stage for the lens
- Turn on all lights, including under‑cabinet fixtures. Hide cords, bins, and small appliances.
- In the kitchen and dining room, keep styling minimal. Aim for clean counters and a single focal prop.
- For exteriors, mow, edge, sweep the porch, and tuck away hoses and toys.
Include virtual tours and a floor plan
- Offer a measured floor plan so buyers can understand scale and flow.
- If you add a 3D or virtual tour, start at the front door and move logically so viewers can feel how rooms connect.
Create a simple house folder buyers love
Buyers of historic homes crave clarity. Prepare a neat folder or binder for showings that includes:
- A one‑page highlight sheet of upgrades and recent maintenance
- Copies of permits, warranties, and service records
- A brief note of any exterior approvals, if applicable
- A short list of neighborhood amenities and nearby cultural institutions
This small step supports confidence and keeps attention on the home’s strengths.
Ready to list with confidence
When you respect a Museum District home’s original fabric and stage with restraint, you invite stronger offers and smoother negotiations. If you want help prioritizing updates, styling, and a photo plan that honors your home’s story, let’s connect. Gary Martin blends construction insight with premium marketing to present period homes at their best. Let’s talk about your Richmond home.
FAQs
Do I need permission to paint my Museum District exterior?
- Possibly. Some local historic districts require approval for exterior paint and material changes, so confirm your jurisdiction and any review process before you start.
How much should I invest in historic feature restoration before listing?
- Focus on visible, cosmetic wins like cleaning, touch‑ups, hardware, and lighting. Reserve full restorations for longer timelines unless market comps support the cost.
Is exposing original hardwood or plaster risky in an older home?
- Only expose materials that are in fair shape or can be quickly repaired, and review the EPA lead‑based paint guidance before disturbing painted surfaces in pre‑1978 homes.
Will staging erase my home’s character?
- Not if done correctly. Good staging frames fireplaces, moldings, and built‑ins, and avoids oversized furniture or trendy finishes that compete with period details.
How long does this staging plan take before a spring listing?
- Cosmetic staging typically takes one to three weeks, with an additional few days for photos. Exterior work that requires approvals will add lead time.